Tag Archives: magnet

Father’s Day Magnet

dadmagnet

Submitted by: Jennifer Galvin

Make a cute magnet for Father’s Day to display on the fridge!

Goals:

  • To practice fine motor skills
  • To practice using scissors
  • To practice tracing

Before You Start:
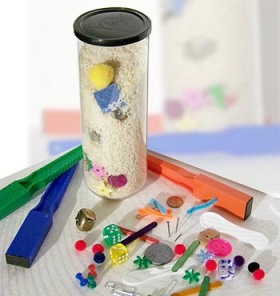
Gather materials needed: a circular lid from a plastic container, magnet, felt, glue, markers, buttons, feathers and other collage materials, and a picture or piece of artwork.

Let’s Get Started!
Step 1.
Place the lid on top of the felt and trace around it. Cut out the felt and glue it to the top of the lid.

Step 2.
Glue a picture of the child or a piece of artwork by the child onto the felt.

Step 3.
Decorate around the picture your choice of collage materials.

Step 4.
Glue a magnet to the back of the lid. If necessary, trim the rim of the lid with a scissors.

Furthermore:
Make several magnets for Dad, with different messages or pictures on each!

Products You May Need:

Magnetic Discovery Bottle

discoverybottle

Submitted by: Tracy Emond

Children will help create their very own magnetic lab using everyday materials. Young ones will discover the forces of magnetic attraction. This is a great way to get kids excited about science.

Goal:

  • To encourage discovery of basic scientific concepts

Before You Start:
Gather the following materials: uncooked white rice, a tennis ball can (with label peeled off), crafting glue, magnetic wand, pom-poms, magnetic marbles, pipe cleaners, rhinestones, beads, colored wood cubes, foam shapes, jingle bells, paper clips and coins. Tip: have items on hand that both attract and repel magnets. After you have gathered all of the items, lay them out on a large table.

Let’s Get Started!
Step 1.
Have children help you select and place some of the following items into the tennis ball can (about 15-20 different pieces): pom-poms, pipe cleaners, magnetic marbles, rhinestones, beads, colored wood cubes, foam shapes, jingle bells, paper clips, coins etc.

Step 2.
Fill the tennis ball can almost to the top, and pour the white rice inside the can, covering all of the items. Leave about 1″ of space between the rice and the top of the can. (Tip: make sure the items you put into the can are brightly colored, so they show up in the rice.)

Step 3.
Line the inside of the lid with glue and place the lid back onto the tennis ball can, sealing the items and rice inside.

Step 4.
Have children take turns using the wand to run over the outside of the tennis ball can to see what attracts and repels the magnets. Take this opportunity to go into depth about magnetic properties.

Furthermore:
Discuss further what items attract versus repel the magnets. Ask the kids to name other items around your center that they think might be magnetic and ones that are not, based on their observations of this activity. To further reinforce this lesson, consider using magnetic discovery boards and kits.

Products You May Need: